My iPhone XR is great for taking a lot of pictures and I use it all the time, including as a hiking camera. The iPhone XR’s limited zoom capability can be a problem, however, when using it as a hiking camera. The iPhone’s GPS is great, allowing me to track all my hikes using the Activity app. The drawback is the battery life of the phone won’t survive longer backpacking trips if it is left on all the time. These two things made me think about getting a dedicated GPS and a new hiking camera. But let’s be real, the facts are that I wanted to get a few new toys for the upcoming outdoor season and all the rest is just rationalization!
So, my technology objectives were two-fold. First, get a hiking camera offering “superzoom” capabilities that was lightweight with great optics. Second, supplement that with a GPS with long battery life to track hikes and enable an SOS via satellite in an emergency.
On a more serious note, we’re all hoping the upcoming outdoor season is available to all of us and the COVID-19 lockdowns are loosened up. And more importantly, my heart goes out to the families disrupted by the death of loved ones due to the virus. It’s a terribly sad time and we all look forward to it coming to an end.
Finding a hiking camera
As I mentioned, I’ve used my iPhone XR on most of my hikes. My other camera was a Canon EOS Rebel T2i DSLR from 2010. The iPhone takes great closeups, portraits and other basic photos and is typically with me most the time (my sons say “it IS with you all the time old man!”). The camera capabilities break down, however, when you need to zoom in extensively. I’ve also noticed some clarity issues on panorama shots.
The Canon T2i is a good DSLR that’s served me well in many situations. I’m not a big fan, however, of lugging along multiple lenses to get different shots. As a result, the camera spent more and more time in my closet. There, rationalization for toys complete.
Mastering Paralysis by Analysis
There are lots of resources for camera reviews available on the web. The two sites I found most valuable were Camera Decision and Best Camera Photography Blog. The Camera Decision site does side-by-side comparisons while the Best Camera Photography Blog provides more in-depth reviews. Together they provided me with a lot of data!
It took days (yes, days!) to whittle my list down to 13 cameras, a clear sign I have way too much time on my hands. These 13 cameras are listed in the table below. The headings indicate items that were important selection criteria to me. Image Rank and Overall Rank came from Camera Decision. For each camera, I read the detailed review on the Best Camera Photography Blog. Again, you should be thinking “Rob has way too much time on his hands”.
| Camera | Sensor Size | Year Released | Megapixels | Best Price | GPS | All Weather | Max Zoom | Weight | Image Rank | Overall Rank |
|---|---|---|---|---|---|---|---|---|---|---|
| Panasonic FZ2500 | Large | 2016 | 20 | 769 | No | No | 480mm | 915 | 51 | 76 |
| Panasonic FZ1000 II | Large | 2018 | 20 | 739 | No | No | 400mm | 808 | 51 | 74 |
| Sony RX10 IV | Large | 2017 | 20 | 1049 | No | Yes | 600mm | 1095 | 51 | 74 |
| Sony RX10 III | Large | 2016 | 20 | 859 | No | Yes | 600mm | 1051 | 51 | 73 |
| Panasonic FZ300 | Small | 2015 | 12 | 598 | No | Yes | 600mm | 691 | 34 | 73 |
| Sony HX400V | Small | 2014 | 20 | 448 | Yes | No | 1200mm | 660 | 23 | 54 |
| Panasonic ZS70 | Small | 2017 | 20 | 298 | No | No | 720mm | 322 | 37 | 65 |
| Panasonic ZS80 | Small | 2018 | 20 | 349 | No | No | 720mm | 327 | 37 | 64 |
| Panasonic FZ80 | Small | 2017 | 18 | 298 | No | No | 1200mm | 616 | 36 | 59 |
| Canon SX70 | Small | 2018 | 20 | 549 | No | No | 1365mm | 608 | 37 | 60 |
| Nikon P900 | Small | 2015 | 16 | 597 | Yes | No | 2000mm | 899 | 22 | 56 |
| Nikon A1000 | Small | 2019 | 16 | 417 | No | No | 840mm | 330 | 36 | 57 |
| Nikon P950 | Small | 2020 | 16 | 796 | No | No | 2000mm | 1005 | 36 | 63 |
After spending even more time trying to analyze the cameras I realized I wasn’t making any progress. I was officially experiencing paralysis by analysis.
Help needed!
At this point I was stuck. My inclination was to get the Sony RX10 IV since it was supposed to be the best hiking camera. Never mind that I’m not a very good photographer and am a beginner in understanding all the features. It was the most expensive and the best! Luckily, I opted for a second opinion.
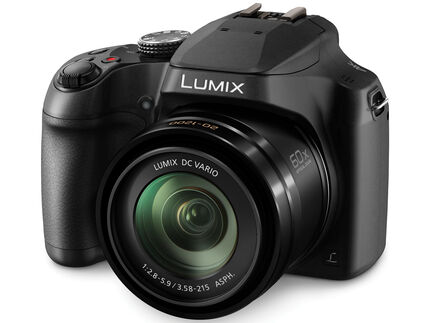
Tanya was a saint and went through my spreadsheet with me. She patiently listened to my techno babble and then asked a question here and there. Her questions led me to either the Panasonic FZ80 or one of the large sensor cameras. The Panasonic FZ80 made the most sense as a starting hiking camera given the lower price and my limited experience level. I’m convinced she knew that within the first 30 seconds.
I ordered the hiking camera from Amazon and immediately took it out on a hike. You can see the pictures in my Carpenter Peak post. The zoom was incredible although the haze made it a challenge at that ridiculous level (1200mm!). It sure was easier to capture pictures of butterflies and birds from a distance. I’m pleased with the camera in the little time I’ve had it knowing I have a ton to learn.
Picking a GPS
This year will bring more backpacking trips since I’m not working full time. Most of these will be solo backpacking. It’s always a good idea to have a safety net and a way to check-in with loved ones when solo backpacking, or so I’m told by my loved ones.
There are two satellite networks most units use for two-way communication, Iridium and Globalstar. Iridium is considered the gold standard although for North American hiking, either will probably work for you. Both services have fairly good maps of their coverage. My travel plans include some international travel to South America and other areas, so I decided to stick with Iridium. That leaves primarily the Garmin devices as options.
I read the usual REI and Amazon reviews. Needless to say, there are some strong feelings about GPS devices on those sites! The best review I found was by Cris Hazzard at Hiking Guy. His reviews are really informative and his site is loaded with lots of great information. So maybe skip the rest of this post and just read his site.
It was unusual for me to quickly narrow down my options to either the Garmin 66i or Garmin Explorer+. I mean, I didn’t even create a spreadsheet! The 66i feature set was really nice but it did seem to have a limited battery life for the type of tracking I wanted. Plus, the 66i was expensive. The battery life of the Explorer+ is perfect for me, and I don’t need to load 10,000 waypoints like that supported by the 66i. Even if I hike the Colorado Trail, the guide book and 500 waypoints at a time should suffice by reloading waypoints at different segment stops. An Amazon seller was offering a “Like New” option for $365 so that’s what I got. It’s now on sale at REI for $349 (see link above).
InReach Subscriptions
InReach offers a variety of plans for two-way satellite communication. The Freedom Safety plan made the most sense for me since it offers unlimited preset messages. The preset messages are maintained on the Garmin website where you enter in the message text and recipients. On the device, you select Preset, pick the message and send it off. Preset messages work for my objective to let people know I’m safe on the trail at no incremental cost. You can upgrade and downgrade your plans at any time at no additional cost (as of April 2020, compare the plans here). The $18/year optional insurance for $50,000 of rescue coverage made sense so I selected that too. Activating a plan is simple at Garmin’s site: inreach.garmin.com.
Putting it all together
With all this new technology, there were things I had to work out to get everything flowing the way I wanted. First, get the GPS tracking data from either the phone or Explorer+. Second, to have the ability to plan hiking routes on my computer or phone and push those to the Explorer+. Lastly, a method to merge the GPS tracking data with pictures from the hiking camera to update EXIF location information, you know, geo tagging.
Extracting GPS data – iPhone’s apps make it easy
On my phone, I use the Activity app to track outdoor hikes, walks and runs. This data is stored in the health database on the iPhone and there is no native way to easily export it in a GPX format. The app I selected to extract the data is the HealthFit app. It isn’t free, but it’s well worth the $2.99 I paid. It exports GPS data and more from fitness apps on the phone, including the native Activity app, into the standard GPX Track format. In settings under “Data”, you can sync every activity automatically to iCloud.
The app creates a HealthFit folder in iCloud and automatically pushes a GPX Track file for each activity. It is truly a set it and forget it tool which I really like! Using iCloud on my PC, I can get any GPX track from any activity on my phone. Phone problem solved! Life would be easy if only HealthFit pulled the data automatically from the Garmin Earthmate app.
Extracting GPS data – Load Earthmate, find wall, bang head
Getting data from the Explorer+ using an app isn’t quite as intuitive. Normally you’ll only keep detailed tracking on the Explorer+ to avoid InReach subscription charges and reduced battery life by sending it to the cloud while you’re out. That means the detailed GPS tracking data is only on the device. As a result, I have to sync the data to the Garmin cloud or my iPhone after my trip to get to it.
One way to get to the Garmin data is to use the Earthmate app. The app requires Bluetooth pairing your Explorer+ with the iPhone. Pairing is similar to any other Bluetooth device (see Garmin’s instructions). From here, things get less intuitive and could be made a lot simpler by Garmin.
You can easily see the latest track from the Explorer+ by launching the Earthmate app on the phone and choosing the Tracking button. I’d expect to be able to select the share icon in the upper right while viewing a track to export the GPX Track to a file. Nope, that button only allows you to share it via MapShare. It also isn’t possible to see past tracks, only the latest track or all tracks…definitely not intuitive to me.
The Earthmate app will, however, sync the data to the cloud where you can do more with the data. Under More -> Options -> Account & Sync, enter your cloud credentials and sync your data. The app will automatically sync the first time it is launched. After that, you have to manually sync by going to this option buried in the sub-menu (why in the world is this the case?). The workaround is to close the app and relaunch it anytime you want to sync data. Oh, for added fun, your credentials for the cloud will disappear periodically.
Another way – InSync on the PC
Luckily there is still the old-school Garmin InSync application which works much better for me. Simply install the application on your PC or Mac. The install walks you through connecting your account to the application. After that, launch the app and connect your your Explorer+ via USB. The sync will kick off automatically. You can push new maps, firmware updates, map updates, routes and any other data housed at the Explore website to the device. After a sync, tracking data shows up on the web under your Library in the Tracks section.
Speaking of the website, it has another nice Garmin quirk. There is no button to update the library with recently uploaded tracks. You have to refresh the entire page via the browser refresh button and then they will show up. Completely intuitive, right? The page refresh allows you to finally see the new uploaded tracks in the Library. Then you select a track to see it on the Map. Once displayed on the map, choose the export icon in the upper-right corner and save the track in a GPX file format. I store these in iCloud along with HealthFit data.
Garmin clearly has some product integration work to accomplish. My guess is they won’t be reading this page for product ideas.
Route Planning
The website at explore.garmin.com is the cloud implementation of Garmin’s Basecamp application. Basecamp still has many features that the website doesn’t so if you’re used to it, be prepared for a bit of frustration. Garmin has ceased developing Basecamp so I decided to stay with the Explore web app.
Creating a route is pretty easy. Generally I’ll use Alltrails or GAIA to find the trails. You can enter a town near the trailhead in the search box to get your map centered. Once I’ve found the trail, I’ll click the New Route button represented by two thumbtacks. Then I make a bunch of small clicks tracing the trail. It’s not as easy as the way Basecamp snaps to trails but will work.
As before, I use the InSync method to sync my Explorer+ and the route appears on my device. You can also send it directly if you have the Earthmate app running and the Explorer+ paired with the phone.
Geo Tagging Pictures
The final step is to geo tag the pictures themselves. Understanding which tools to pick for geo tagging is going to vary depending on the process you use for picture processing.
Panasonic provides a lot of ways to get picture data from the camera to another device. You can use their app on your phone, connect to a Mac or PC on your home Wi-Fi network, or upload from the camera to a cloud service (LUMIX Club, Panasonic’s integration hub).
I keep it simple by putting the SD card in my PC and copying the pictures directly. I select and edit pictures I want to keep while deleting all the unwanted ones (there are a LOT of those!). The keepers are uploaded using the iCloud Windows app. Since all this is on my PC, the easiest way for me to save EXIF geo location data is on my computer.
The tool I use is GPicSync. It’s a basic app that merges the GPX Track file, either from HealthFit or exported from Garmin’s site, into the location EXIF data of the pictures. The merge uses time stamps on the file to find the best location match. There are two important settings for success, the OTC Offset and nearest track point threshold used for a match. The OTC Offset didn’t pick up the daylight savings setting for some reason so my camera time and the app time were off by an hour. I manually set the offset to -7 and the picture merge was successful. The time difference threshold is important if you’re taking fewer track points on the Explorer+. Normally these track points are every 10 or 30 minutes on the Explorer+ to save battery. If it’s 10 minutes, use 600 as the threshold and 1,800 for 30 minutes.
The Panasonic App
As a brief aside, Panasonic’s app allows you to do GPS logging on your phone and then send that data to the camera. The camera matches up time data and will write the geo tag data to the images directly. This guy explains how to connect the camera to the phone. This video isn’t as snappy, but details how to use the app to geo tag starting at about 2:15 of the video. The geo tagging is useful in a pinch although not what I use most of the time since I’m typically tracking GPS data another way. This is more useful for one-time events when I’m not hiking such as shooting sunsets at Jackass Hill Park (and yes, it is a place).
Finally, it’s over, hiking camera and GPS selected
For those that have made it this far, congratulations? You might have just a little too much time on your hands too.
[…] Selecting a Hiking Camera and GPS supporting Geo Tagging […]
[…] Selecting a Hiking Camera and GPS supporting Geo Tagging […]